HomeAbout MeProduct VideosProductsWholesale Inquiries

Showing posts with label kraft tex. Show all posts

Saturday, September 5, 2015

Watercolor Cards with Color Burst


This year, I've been traveling across the USA, Canada and the UK teaching workshops with a new watercolor medium called Color Burst! I am so happy that it's a product that's easy to use and that everybody  likes it.  For the most part, I've been teaching watercolor technique classes... 


So, today I wanted to take a few minutes to show you some projects using the techniques I teach in my workshops.  I've created a few handmade watercolor cards to illustrate the techniques.  These are simple cards, without a lot of embellishments or sentiments. I prefer "blank" cards, a handwritten note is much more personal.  


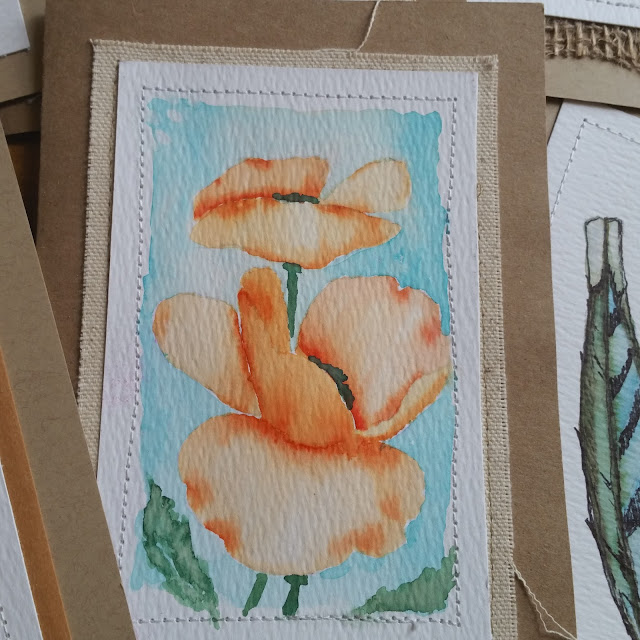
If you've taken a class with me, no doubt, you'll recognize some of the techniques. To get started, I whipped up some stitched card bases by sewing pieces of canvas, burlap, Kraft*Tex and watercolor paper to kraft paper cardstock. This cardbase is simple, and conveys an authentic "handmade" look.  


This first technique is easy, a stamped image, colored with Color Burst, and a simple watercolor landscape painted behind it. The landscape doesn't have to be overly complicated. It's basically a few blobs of paint blended with water. Since it's the background, it doesn't have to be perfectly in focus and overladen with details. If you've taken my workshops, you have all the "tools" to do this.     


This next technique is really dramatic...it's a watercolor resist created with Versamark ink and white embossing powder. Simply stamp, and emboss with a heat tool, then randomly wash a Color Burst (I used Indigo and Ultrmarine Blue) background over the embossed area. The water and Color Burst won't stick to the embossed stamped area. It's simple and elegant. When you give this handmade watercolor note card to someone, they will think you're an accomplished watercolor painter. 
 

I've taught this little watercolor painting about 1,000 times this summer, it's wet on wet watercolor painting.  The trick to this is making sure that your paper is wet enough to let the Color Burst blend easily, but not wet enough that the pigment bloom. Who wouldn't love to receive a tiny painting on a note card? This little painting only takes about 10 minutes to paint. It's very artsy...let the paint and the water do the blending work for you. The paint will always "find the edge" of the water.     


The next two cards could not be any easier, simply stamp an image on watercolor paper with permanent ink, then "color" with Color Burst.  Coloring for adults is so popular now, take your coloring to your cards. You'll get the same "therapeutic" benifit, and make some lovely cards in the process.  
 

For me, simple is best, don't worry about adding a lot of embellishment to this type of card.  Let the color and the stamped image stand front and center.  


I've even slipped in a Christmas card, I am not pushing the season, but it never hurts to get an early start. And, again, simple is best...I used 2 colors, Terre Verte Green and Alizarin Crimson; I used muddy water for the shadows. 
 

I hope you're inspired to create some watercolor cards...the techniques are simple and the "handmade" look is very elegant. When you give these cards to friends, they'll think you're a master watercolor painter, and you should not tell them any differently. 

Thank you for stopping by today, I hope you enjoy the rest of the weekend.  If you create some watercolor cards, I'd love to see them, post them on Facebook, Instagram or Pinterest, and make sure to tag @kenolivercrafts so I'll see them. 

until next time,
Ken

Monday, April 28, 2014

Embossed Copper Collage Classes

Last week, I had the opportunity to teach a couple classes in St. Louis Missouri and in Evansville Indiana...I am always amazed with the creativity my friends and students share when we're creating together.  


I feel extremely blessed to get to teach techniques that inspire others to make art.  


I wanted to share just a few of the photos from each class. I loved seeing the finished projects, and I think you will love them too.  


At the base of this project is embossed copper...we use embossing folders, copper sheets, and patina solution to create stunning backgrounds for our collage pieces.  


It's an easy technique that gives amazing results.  


Often, students bring family photos, my friend Ann commented that she had relatively few photos of her parents together in the same photo...she pieced a couple photos together to create this tribute to them.  


 I love how this project below has a family photograph incorporated into the collage.


For Keeps Sake Rubber Stamps and Paper Arts

Thank you again For Keeps Sake in St. Louis, Missouri, and Mary's Scrap Den in Evansville, Indiana for letting me share some art and some new techniques with everyone at your shops. 

'til next time,
Ken 

Sunday, March 2, 2014

March is National Craft Month!


March is National Craft Month....I kicked off the month long event by teaching a workshop at Frenzy Stamper in Scottsdale Arizona.

Frenzy Stamper is known in the Phoenix area for it's mixed media classes.   


I'd been looking forward to working with the artists at Frenzy Stamper for a long time...a workshop there was a great way to kick off National Craft Month.  


I taught a class on how to create an embossed copper tag deck.  I created this project a while back but I'd never taught it as a workshop before.  You can see more images and details in this earlier post...


Since I knew the artists who frequent the shop liked mixed media, I wanted to show them some cool techniques using leaves and modeling paste to create background textures.  


We started the day creating textured background images in modeling paste by impressing leaves, burlap, combs, and strings into the modeling paste.  Then we adding color with acrylic paints to really bring out the textures.  


It was really interesting to see everyone's textures come to life with color!  


In fact, the texture sheets were so beautiful, they looked as if they could be framed and used as art.  


Each student's texture sheet was different and each amazing.  


We cut pieces of Kraft*Tex and copper sheet to use as mats behind die cut pieces of the texture sheets we'd just created. 


The layered effect is beautiful.  


And then we used bits of scrapbook papers and printed ephemera to create mini collages.  


Each collage was different, and interesting...


Some students brought copies of family photos to use in their collages.  Jill brought color copies of photos of her grandchildren.... 


to make her art personal.  


The results were amazing!  


It was great to kick off National Craft Month with a workshop at Frenzy Stamper!  I've got a busy month in store with more workshops and classes.  


Thank you for stopping by today, I hope you will be inspired to create something beautiful! 

Ken

Resources: